Sometimes a project starts with a simple wish: I wanted to extend my STM32F407 Discovery board with a 2.4" touchscreen and a USB-A port for a keyboard – as a clean stackable shield instead of a mess of jumper wires. That wish turned into a complete, order-ready KiCad project. Here is the build log.
The idea
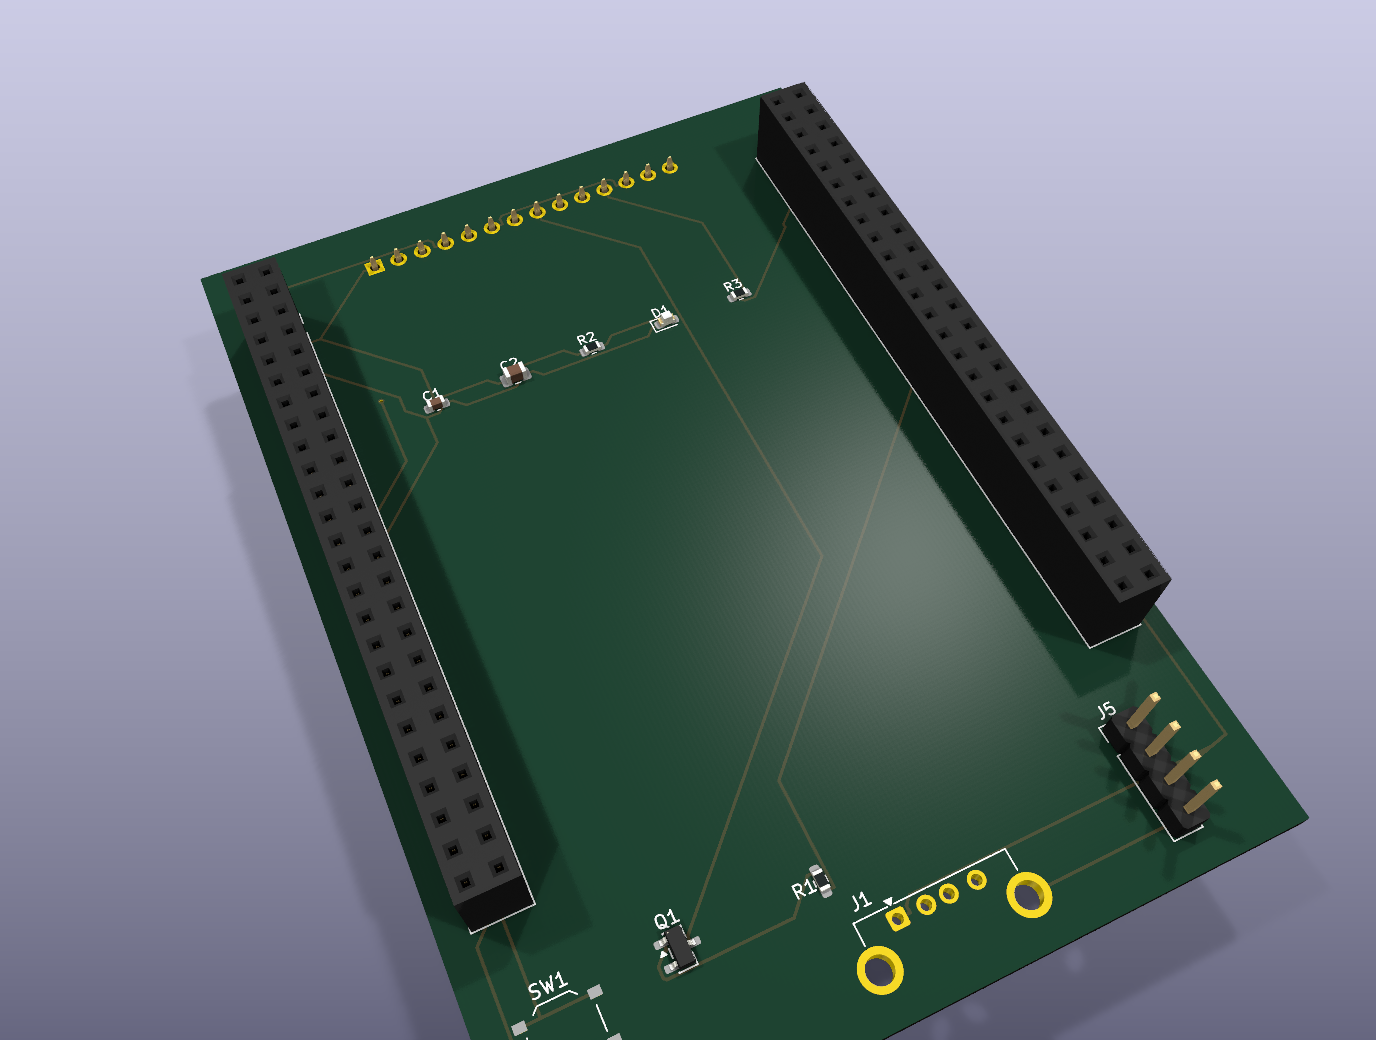
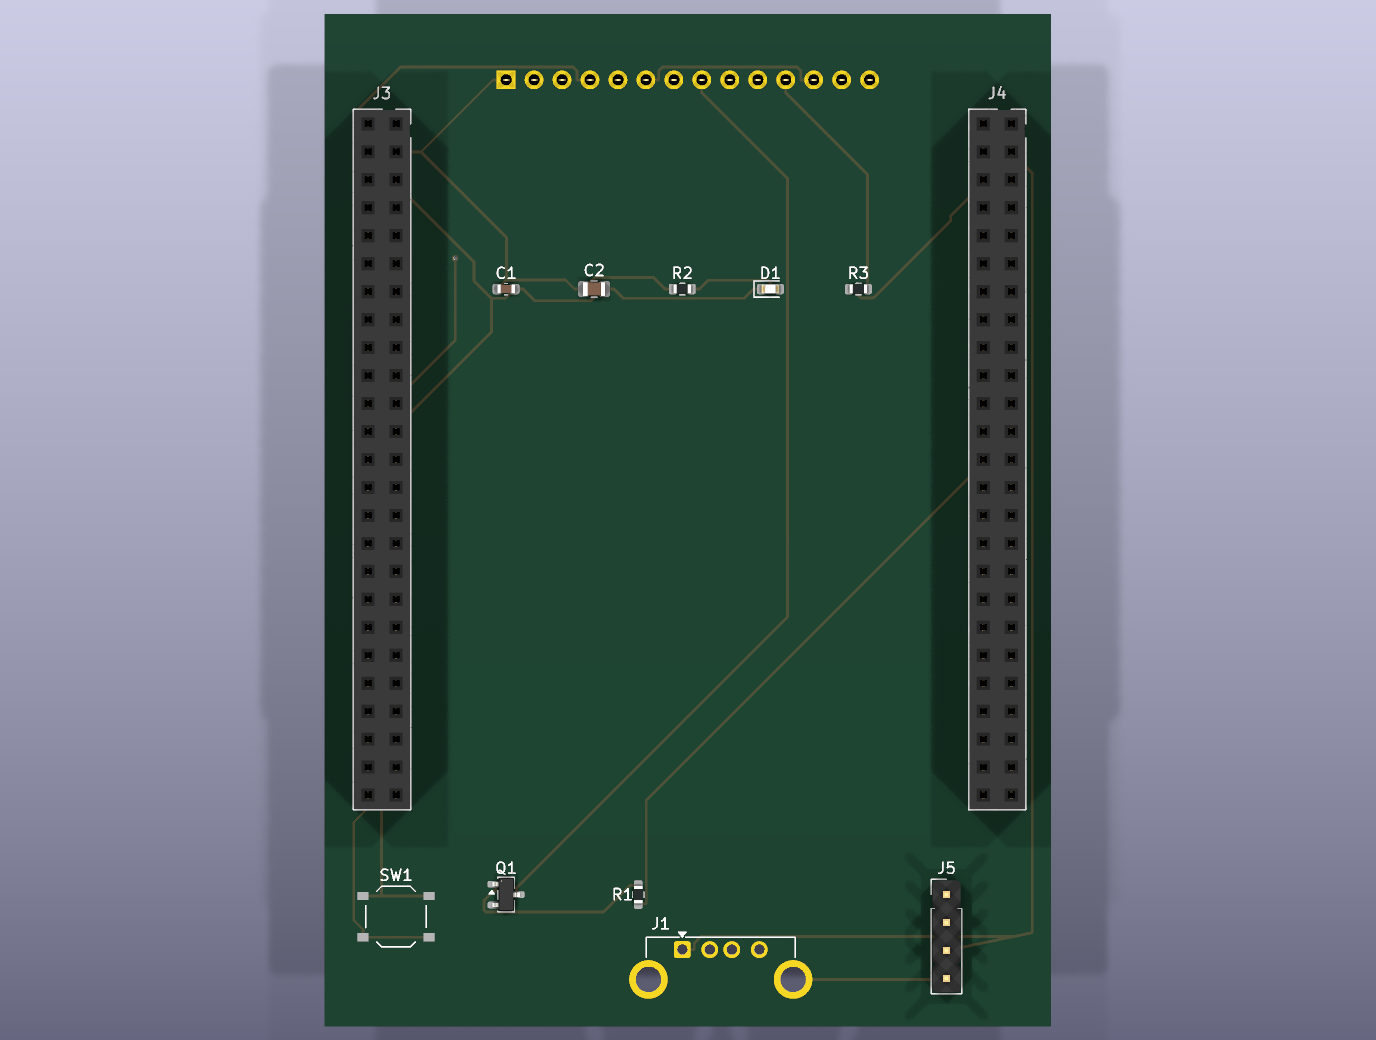
The shield plugs onto the two 2×25 headers (P1/P2) of the Discovery board and adds:
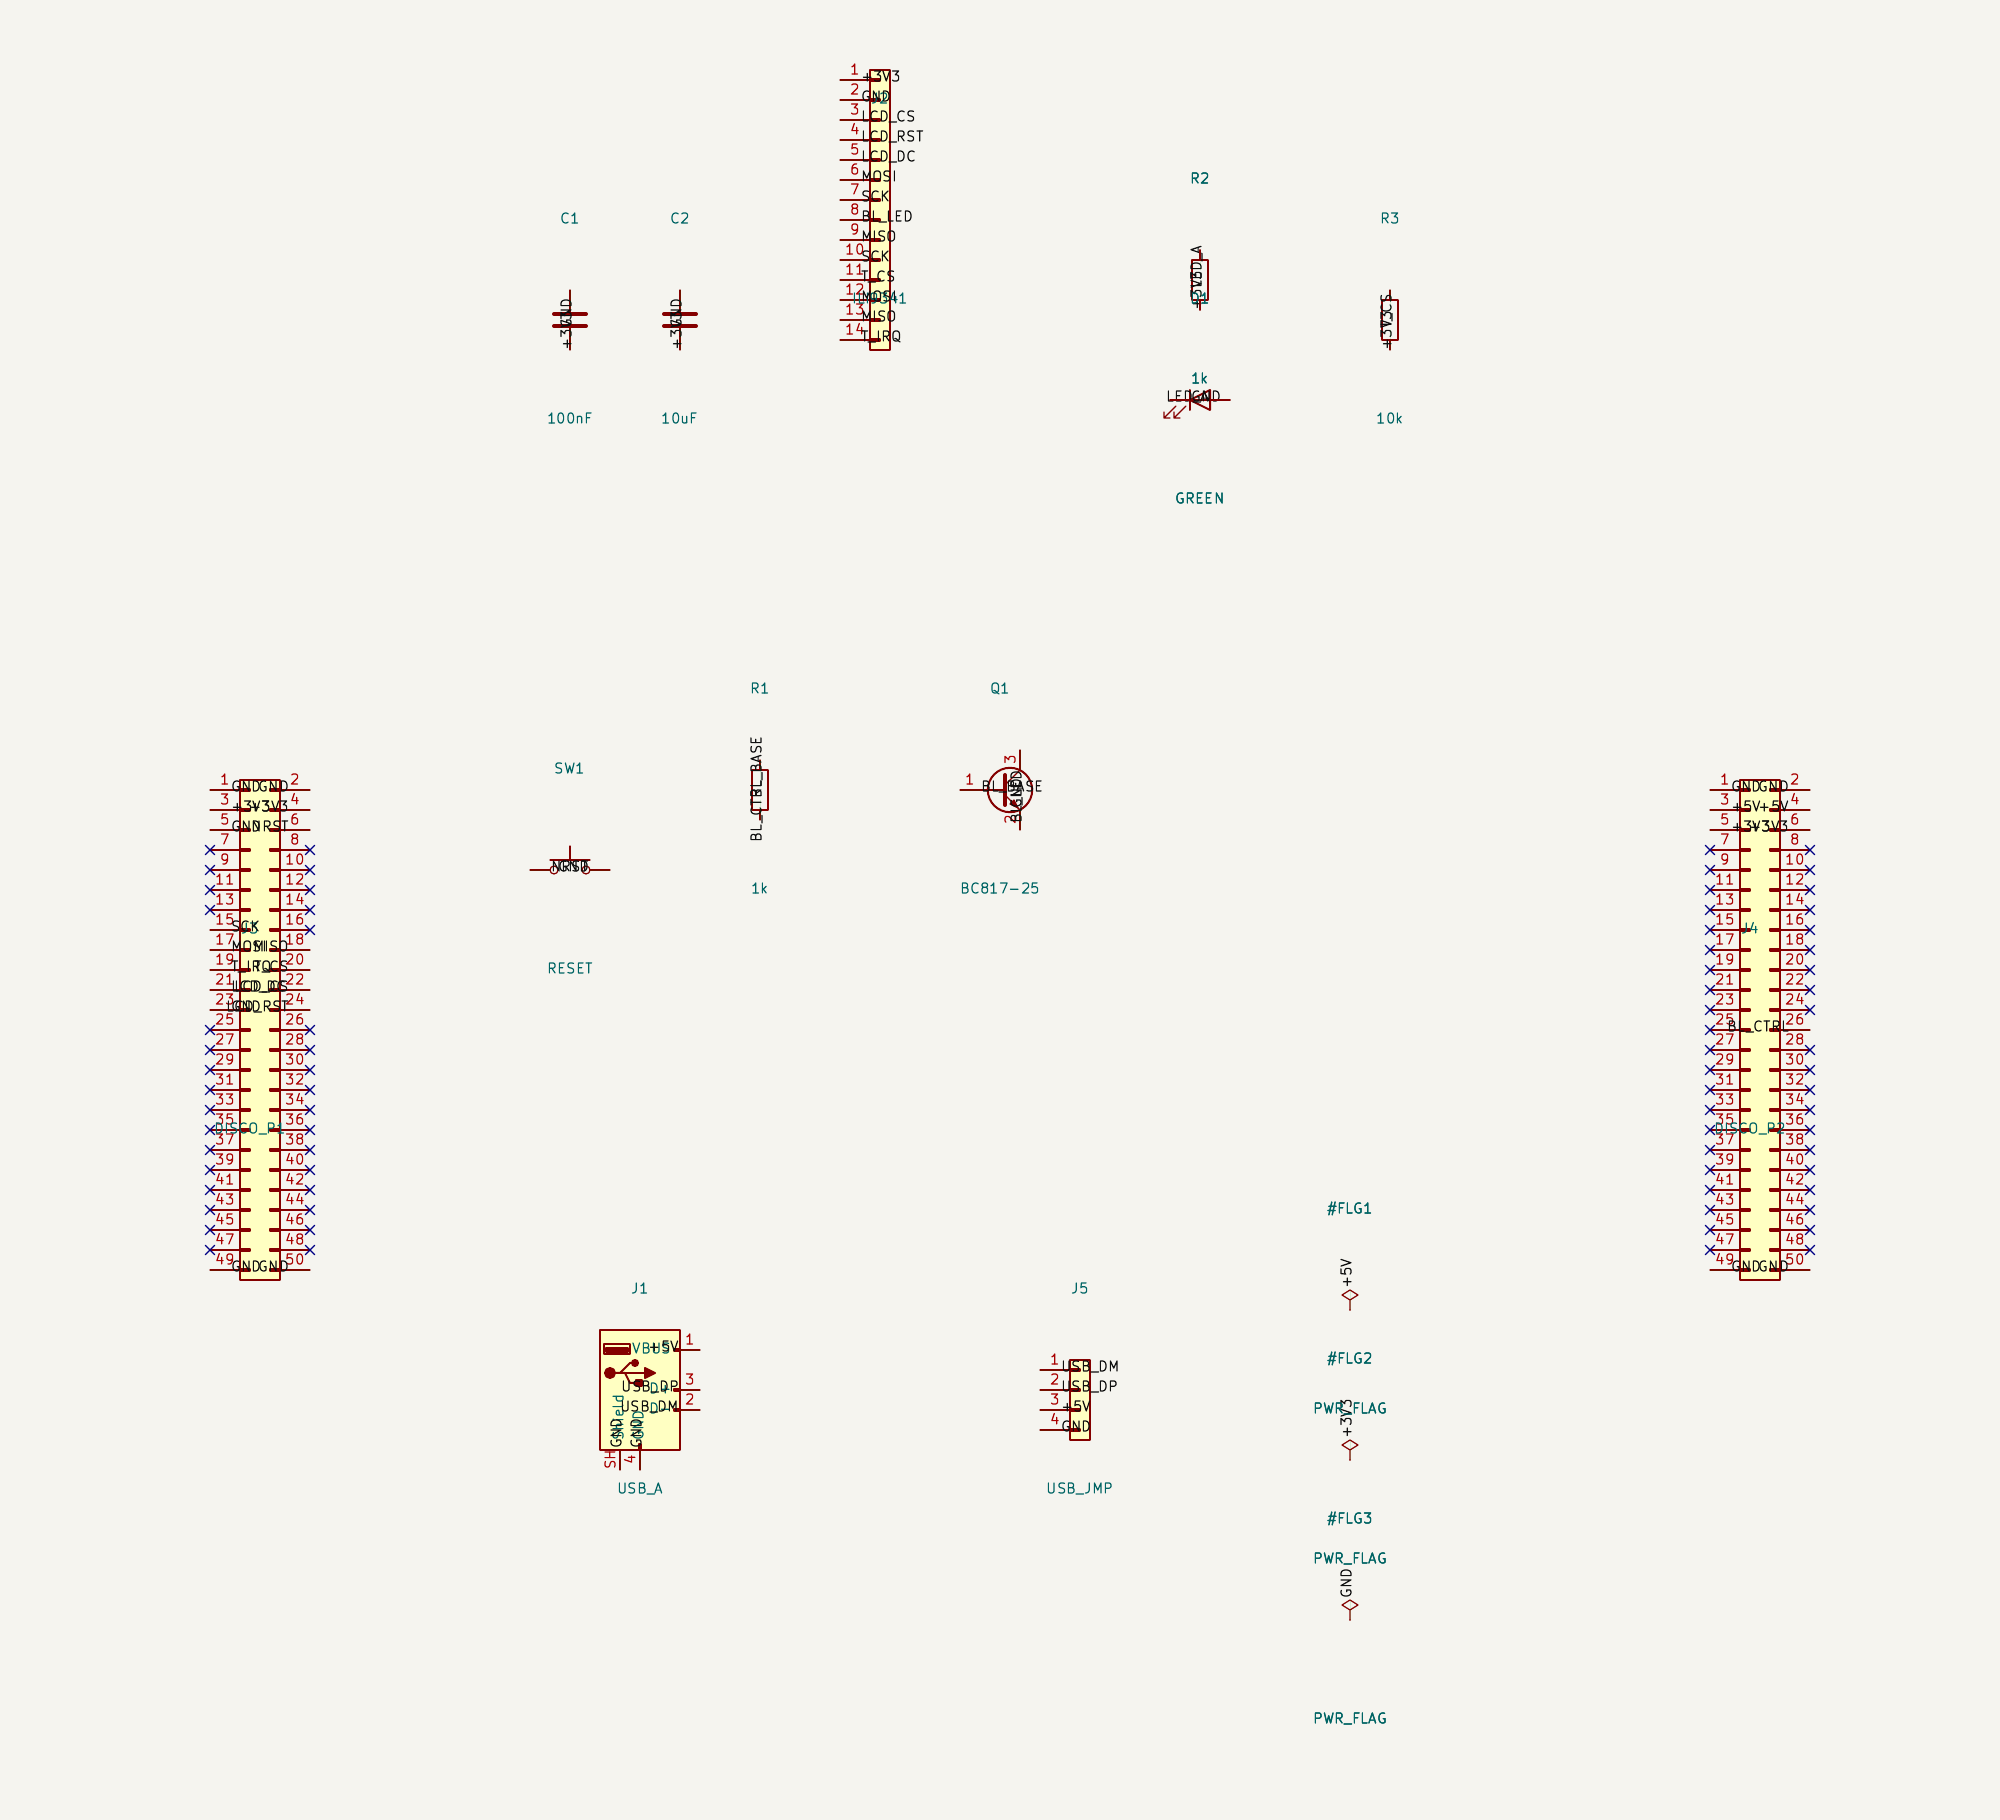
- an ILI9341 TFT (240×320) with resistive touch (XPT2046), both on the SPI1 bus, pluggable via a 14-pin socket
- a USB-A host port (USB OTG FS) for a keyboard
- a power LED, a reset button, and a BC817 transistor for backlight control
The most important realisation first: it’s only a shield
The STM32F407 lives on the Discovery board – not on the shield. So the shield carries no microcontroller at all, just connectors and peripherals. Every signal (SPI, GPIO, power) arrives through P1/P2. That sounds trivial, but it changes the whole design: no MCU symbol, and instead meticulous care with the header pin assignments.
The gotcha: PA11/PA12 are missing
The spec called for USB on PA11 (D−) and PA12 (D+). While verifying the header pinout against ST’s manual (UM1472), the surprise hit: PA11 and PA12 are not on P1/P2 at all – they are only wired to the onboard micro-USB connector (CN5). Without that check, a non-functional board would have gone to fabrication.
The fix: the shield gets the USB-A socket plus a small 4-pin header (D−, D+, 5V, GND). Two short jumper wires from CN5 to the header – done. Pragmatic, and honestly documented.
From schematic to layout
Everything was built in KiCad 10. The schematic is ERC-clean (0 errors, 0 warnings) and the netlist was checked 1:1 against the spec: a shared SPI bus (SCK/MISO/MOSI to both display and touch), separate chip-selects, and the backlight driven as a low-side switch through the BC817.
The layout is a 2-layer board (66 × 92 mm). The two 2×25 sockets sit exactly on the Discovery grid (2.2″ / 55.88 mm centre-to-centre), and the USB socket sits at the edge. Signals run on the top layer with a solid GND plane on the bottom. Routing was done with Freerouting; one stubborn net – the +5V rail running the full height of the board – was pinned as a fixed trace down the right-hand edge so the autorouter could finish everything else around it. After a few iterations: DRC clean, every net connected.
One mechanical detail worth calling out: the display socket is mounted on the back of the shield (facing away from the Discovery) and oriented so the module clears the microcontroller underneath – with tall enough stacking headers, the TFT sits cleanly above the whole stack.
Manufacturing at JLCPCB
For ordering into Germany, JLCPCB including shipping is usually the cheapest option. The strategy:
- The SMD parts (resistors, capacitors, LED, BC817, SMD reset button) are assembled by JLCPCB – every LCSC part number was verified against the parts library for stock.
- The THT connectors (USB-A, display socket, the two 2×25 sockets) I solder myself – that avoids the THT assembly surcharge.
The result is a set of Gerbers, drill files, an assembly BOM and a pick-and-place file – all generated from the command line and fully reproducible.
Lessons
- Datasheets beat assumptions. The missing PA11/PA12 on the headers would have made the whole board useless.
- Always verify LCSC numbers. Two of my first part numbers were wrong – one even pointed at a logic IC instead of the transistor.
- Mechanics before beauty. The exact P1/P2 spacing decides whether the shield fits at all – measure it before ordering.
The outcome: a clean, routed, DRC-checked shield that just needs to be ordered. From a wish to finished fab files.